360 photographers, do you want to make money creating high quality virtual tours without having to spend all day working on the computer?
Imagine being the number 1 virtual tour service provider in your area which clients love and recommend. The secret to your success above anyone else is high quality and speed.
Other virtual tour workflows on the internet are slow and expensive. They use multiple photo editing programs like Photoshop, Lightroom, and Topaz AI to edit a single 360 photo. This is seriously time consuming.
And it's going to eat up your computer storage space. Now imagine editing 30-50 photos per virtual tour...
These programs will easily cost you over £200+ a year. That is £2,000 spent in software subscriptions over 10 years.
And if you don't have a high spec computer anyway, then Topaz AI will take forever to process a single 360 photo. So there must be a faster, cheaper, and easier way, right?
Yes, I am going to show you a proven system to create high quality virtual tours that will attract high paying clients, in a fraction of the time, using the best 360 virtual tour workflow on the internet.
This system will streamline colour correction, recentering, and tripod leg removal in a single software, saving you plenty of time and computer storage space.
Save big on software costs. You only need to spend a one off lifetime fee of £97 to acquire 2 pieces of software, Affinity Photo 2 and the Best360 Virtual Tour Enhancer FX. And then the software is yours to keep for life! No yearly subscriptions!
The best 360 virtual tour workflow is a very simple process to follow and I will guide you step by step below. Sounds good? Let's get started.
Equipment
360 camera
The same cannot be said for Ricoh or Kandao 360 cameras. Their cameras and software will cause you frustrations and headaches.
I know the Insta360 camera is a steep price tag, but I think it is totally worth the hassle free experience making virtual tours. And since you are saving big on software costs, you can afford it!

Micro SD card
I recommend using the SanDisk V30 256GB Micro SD Card. It's the most reliable Micro SD Card on the market today. Be careful of fake Sandisk Micro SD Cards online, so I recommend directly clicking this link to get a genuine card.

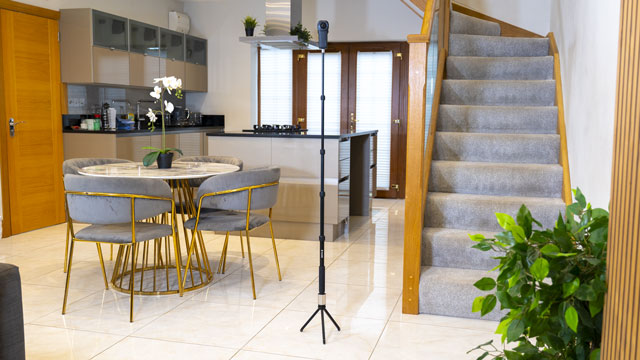
360 camera stand
I recommend using the Best360 Monopod Aluminium Edition. This 360 camera stand is designed to make 360 photo editing effortless. It's modular so you can easily pack the monopod into a small camera backpack. The selfie stick, counterweight, and tripod legs are 3 separate parts.

The long and thin tripod legs have the smallest footprint out of any 360 camera stand on the market today. This makes it super easy to remove the tripod legs in editing.

Software
Insta360 Studio
Insta360 Studio is a free desktop program that comes with your Insta360 camera. This program will be used to stitch the 360 photos together.
Affinity Photo 2
Affinity Photo 2 is the most affordable photo editing software to colour correct, recenter, and remove the tripod legs from a 360 photo. It only costs £67.99 for a lifetime license.
Best360 Virtual Tour Enhancer FX
Affinity Photo 2 cannot natively colour correct 360 photos without producing a hard line in the 360 photo. To overcome this problem, Best360 has developed an Affinity Photo plugin called the Best360 Virtual Tour Enhancer FX, which allows 360 photos to be colour corrected in Affinity Photo. This will streamline your workflow in a single software, keeping things simple and easy. It only costs £30 for a lifetime license.
GoPro VR Player 3.0
GoPro VR Player 3.0 (Windows) | Mac. is the best way to preview your 360 photos after exporting them from Affinity Photo 2. You can double check the 360 photo looks okay before uploading it online.
Kuula
Kuula is the most affordable and beginner friendly virtual tour hosting platform. It's very simple and intuitive to use.
It only costs $20 a month on the yearly pro plan.
If for any reason you decide to stop paying for the Kuula subscription, then just downgrade your account to the FREE plan. All the tours you previously uploaded will remain online forever.
The result
By the end of this blog post you will learn how to make a virtual tour your clients can share online like the example below.
The best 360 virtual tour workflow step by step guide
Now that you have all the equipment and software required, let's begin creating a virtual tour from scratch.
Step 1: Set up the rooms in the property
Turn on all the lights. The ceiling lights, bedside lights, wall lights, desk lights, all the lights! Lights will brighten the 360 photo and make it more eye catching.
Walk around the property and make sure it is clean and presentable. Hide anything you do not want the viewers to see.
Make sure curtains are drawn back to let in as much natural light as possible. The more light there is, the better your 360 photos will look.
Step 2: Set up the Insta360 ONE RS 1-INCH 360 EDITION and Best360 Monopod
Attach the Insta360 ONE RS 1-INCH 360 EDITION to the Best360 Monopod. The camera lens should be between 150-160cm above the ground.

Use the adjustable ring to change the Best360 tripod legs into the narrow position. This will make the tripod leg footprint smaller in the 360 photo, saving you time removing the tripod legs in editing.
Give the camera lenses a quick wipe with the micro fiber cleaning cloth to remove any dirt, dust, or smudges on the lenses.
Step 3: Select correct camera settings
Turn on the Insta360 ONE RS 1-INCH 360 EDITION and connect the camera to the Insta360 app. Using your phone to control the Insta360 camera is beneficial for 2 reasons.
Reason 1, see a live preview of what you are capturing.
Reason 2, tap the shutter button on your phone to avoid touching the Insta360 camera. This keeps the Insta360 camera and Best360 Monopod completely still to avoid blurry photos.
And you can remotely press the shutter button to take the photo when you have hidden from the shot.
Go to HDR photo mode. Standard photo mode can only take a single photo. This limits the amount of information the camera can capture in the darker and brighter areas of the photo.
HDR (High Dynamic Range) photo mode can take multiple photos at the same time. It takes darker photos to capture information in the brighter areas. And it takes brighter photos to capture information in the darker areas.
These photos are then merged together into a single photo with all the information in the darker and brighter areas of the photo, therefore producing a high dynamic range photo with incredible detail.

Select the format, Pureshot. JPEG captures very little information about a photo.
Pureshot captures a lot of information about a photo and automatically reduces noise.

Therefore use Pureshot to capture the highest quality photos possible.

Select the AEB, 9. AEB stands for Auto Exposure Bracketing.
It's how many photos you want to take in a single spot. The more photos you take, the more information is captured about the darker and brighter areas of the photo.

Select the EV, +/-1. EV stands for Exposure Value. It's the difference in brightness between the multiple photos taken in a single spot.
The greater the brightness, the more information is captured about the darker and brighter areas of the photo.

Select the white balance manually. White Balance controls the colour temperature of the photo.
Swipe left to make the photo more cool and swipe right to make the photo more warm. Adjust the White Balance until the photo colour looks natural.
However, don't worry too much about setting the wrong White Balance. You can always correct the White Balance later in editing using the Best360 Virtual Tour Enhancer FX, at zero cost to photo quality (another perk of using Pureshot).

Step 4: Place the camera in the first spot
Pretend you are naturally walking into the property. Take a step inside the door and start the virtual tour there. Keep all the doors closed.

The camera lenses should always face the part of the room where the viewer is most likely to look at. Because the center of the camera lens is the sharpest.
The area in-between the camera lenses, the stitch line area, is the least sharp, and it could show stitch line errors.
Be careful of reflections in mirrors, windows, tv, or any other reflective surface. You will need to remove the reflection of the Insta360 camera and Best360 Monopod in editing.
If you can avoid the reflection by moving the reflective object or camera placement, then do it.
If not, think to yourself, will I be able to remove this reflection in editing? How can I make the reflection easier to remove?
Be careful of the floor pattern. Ideally you want to place the Best360 Monopod where it's easy to remove and save yourself editing time.
Think to yourself, will I be able to remove this tripod leg in editing? How can I make the tripod leg easier to remove?
Step 5: Take the photo
Find a hiding spot to remove yourself from the shot. You can hide behind a wall, behind a furniture, or go to another room.
Check the 360 photo looks okay from the live preview in the Insta360 app, then tap the shutter button to take the photo.
Step 6: Take the next photo (Rinse and repeat)
Once you hear the shutter sound from the Insta360 camera, you can move the Best360 Monopod to the next spot while it is saving the previous 360 photo.
Move the Best360 Monopod 1 natural step forward from the last spot. Hide from the shot. Take the photo. And repeat the process until you cover the entire property.

Step 7: Make a project folder
On your computer, create a new project folder for your Virtual Tour with the property name.

Step 8: Create subfolders in the project folder
Open the project folder. Create 3 new folders.
RAW - to store the RAW Insta360 camera files.
Stitched - to store the stitched Insta360 camera files.
Exports - to store the edited 360 photos.

Step 9: Copy the photos from Insta360 camera to RAW folder
Remove the Micro SD Card from the Insta360 camera. Use a Micro SD Card reader or Micro SD Card adapter to connect the Micro SD Card to your computer.
On the Micro SD Card, open DCIM -> Camera01 folder, and copy all the photos (.dng and .insp) to the RAW folder. Do NOT attempt to rename the files or split up the files into separate folders. This will corrupt the files.

Step 10: Download and install Insta360 Studio
Download and install Insta360 Studio. Open the program. The photos in the RAW folder are currently unstitched in the dual-fisheye format.
To edit the photos in Affinity Photo 2, the photos need to be stitched and converted into the equirectangular format.
Insta360 Studio will convert the dual-fisheye photos into stitched equirectangular photos.

Step 11: Import photos
To import your photos, click "Open Files".

Step 12: Go to RAW folder in project
Open the RAW folder in your project.

Step 13: Select List view
The .dng files are the high quality photos. The .insp files are the low quality photos. You must only import the .dng files into Insta360 Studio to work with high quality photos.
The .dng files rely on the .insp files to be processed correctly in Insta360 Studio. So do NOT delete the .insp files.
To separate the .dng files from the .insp files, Select "List" view.

Step 14: Select sort by Kind
Select sort by "Kind". Now the .dng files are listed together.

Step 15: Select all .dng files
Select all the .dng files and click "Open".

Step 16: Batch export all photos
All the HDR 360 photos will load on the left hand side. On the bottom you can see the set of 9 photos merged into a single photo.
To batch export all HDR 360 photos, select all the photos on the left hand side, either Command + A on Mac or Control + A on Windows. Then click "Start Export".

Step 17: Select Export 360 photo
Select "Export 360 photo" to create stitched equirectangular photos.

Step 18: Save the stitched equirectangular photos to Stitched folder
Next to File Path, click "Change". Navigate to the Stitched folder in the project folder. And click Open. Now Insta360 Studio will save the stitched equirectangular photos to the stitched folder.

Step 19: Check settings and export
Make sure to check "Export all exposure photos". Affinity Photo 2 will HDR merge the photos exported from Insta360 Studio.
Click "Start Export". And grab a cup of tea while you wait for the photos to export from Insta360 Studio.

Step 20: New HDR merge in Affinity Photo 2
Download and install Affinity Photo 2. Open the program. Go to File -> New HDR Merge.

Step 21: Add first photo
Click "Add" and navigate to the Stitched folder.

Step 22: Open stitched folder
Open the "Stitched" folder.

Step 23: Open photo folder
Here are the photos exported from Insta360 Studio. Each folder is a single photo. Open the first folder.

Step 24: Open 9 photos
Inside the photo folder is a set of 9 photos that make up the photo. A merged .dng file made from the set of 9 photos. And a merged .insp file made from the set of 9 photos.
The merged .dng and .insp files are no use. You cannot import the merged .dng file into Affinity Photo 2 and start colour correcting. Affinity Photo 2 will produce a hard line in the photo, making it unusable for Virtual Tours.
Instead, select the set of 9 photos only and open it.

Step 25: Uncheck options
Make sure to uncheck "Automatically align images", "Automatically remove ghosts", "Noise reduction", and "Tone map HDR image". Then click "OK". Wait for the photo to HDR merge.

Step 26: Download and install Best360 Virtual Tour Enhancer FX
Download the Best360 Virtual Tour Enhancer FX. To install the Best360 Virtual Tour Enhancer FX on Mac, double click on the .afmacros file to automatically install it.

A pop up dialog will confirm the installation is successful. Click "OK".

Step 26a: Install Best360 Virtual Tour Enhancer FX (Windows Method)
To install the Best360 Virtual Tour Enhancer FX on Windows, go to Window -> Library.

Across the Library tab, click the Hamburger menu icon (3 vertical lines). Then click "Import Macros..."
Navigate to where you downloaded the Best360 Virtual Tour Enhancer FX. Select the .afmacros file. And click "Open".

And at the bottom of the Library tab, the Best360 Virtual Tour Enhancer FX is listed.

Step 27: Apply Best360 Virtual Tour Enhancer FX
This is where the magic happens. Make sure the photo is selected on the right hand side. Click "Best360 Virtual Tour Enhancer FX" in the library, and the photo is automatically colour graded.
The settings are customisable. Double click White Balance to adjust the colour temperature. Double click Contrast to adjust the brightness. Double click Colour to adjust the saturation. And double click Unsharp Mask to adjust the sharpness.

Step 28: Recenter 360 photo
To edit the center point of the 360 photo, go to Layer -> Live Projection -> Equirectangular Projection.

In the top left hand corner, adjust the heading to move the 360 photo left and right.

To confirm the new center point, click "Centre Coordinate System".

Step 29: Remove tripod legs
To look down the at tripod legs, adjust the Pitch to 179 degrees.

Click and hold the mouse down on the brush tool. While holding the mouse click down, hover over the Inpainting Brush Tool, and let go of the click to select it.
Use the settings in the top panel to adjust the brush size, until it is big enough to cover the tripod legs. And change the brush hardness to to around 50%.

Hold the mouse click down and drag a selection over the tripod legs. Then let go of the click.

The tripod legs have magically disappeared.

Step 30: Save 360 photo
To save the 360 photo, make sure to remove the projection first. Otherwise you will not be exporting a 360 photo. To do this, go to Layer -> Live Projection -> Remove Projection. This will return the 360 photo back to normal.

Go to File -> Export.

Make sure JPEG is selected and the preset is JPEG (Best quality). Click Export.

Enter a filename. I will name the file by the floor name and hotspot number. Save the 360 photo in the "Exports" folder within the project folder.

The 360 photo will be saved to the "Exports" folder, ready to view or upload.
Step 31: Edit next 360 photo (Rinse and repeat)
Close the photo. Go back to Step 23 and repeat the process for the next folder (with the next photo).
Step 32: Preview 360 photo
Download and install GoPro VR Player 3.0 (Windows) | Mac. To preview a 360 photo, click "Select Files".

Navigate to the "Exports" folder in your project folder. Select the photo and click "Open".

Click and drag the 360 photo to look around.

Step 33: Create a virtual tour using Kuula
Visit Kuula website and create an account.

Click Upload -> Create tour.

Name the Virtual Tour.

Under the Posts tab, click "Select Images" to upload the exported photos from Affinity Photo 2.

Navigate to the Exports folder in your project folder.

Select all the photos and click "Open". The photos will begin uploading to Kuula automatically. This may take some time.

Click and drag a photo rearrange it in your preferred order.

Go to the Tour settings tab. Change the Privacy to Unlisted. This will keep your project away from being shared publicly. When the Virtual Tour is unlisted then only viewers with a direct link can access the Virtual Tour.
Turn on Walkthrough Mode and Click Anywhere. This will make the Virtual Tour easier for the viewer to navigate. Then click "Post".

Step 34: Add hotspots
Hotspots connect the photos together. This makes the photos clickable from one photo to another. With the first photo selected, drag the other photos where they were taken.

With the hotspot selected, make sure the position is set to Floor.

Now the hotspot will look like it is placed on the floor.

This is what the photo will look like with some hotspots added. The hotspots are also added over the furniture because the Click Anywhere feature is turned on. This allows the viewer to click anywhere in the 360 photo, and automatically move to the nearest hotspot where the viewer clicked.

Click Anywhere is a better user experience for the viewer. I personally think the white hotspot icons are distracting when using Click Anywhere. But some people will prefer the white hotspots icons showing so the viewer knows where to click.
If you want to hide the white hotspot icons, then click each hotspot, and change the opacity to 0%.

Repeat the process for the next photo. Add all the hotspots. And then click the next photo.

To add a hotspot onto a door to enter the room, drag and drop the photo in the room on the door.

Change the hotspot to the Wall position and it will display correctly.

Step 35: Share the Virtual Tour
Once the hotspots are added to all the photos within the Virtual Tour, click "Close".

Click "Share".

Click "Get Link Or Embed Code".

There are many options to customise how the Virtual Tour is displayed to the viewer. I prefer to choose Optimise for image quality (HD) over Optimise for load speed.

I prefer to set the loading to Auto load when possible instead of Start with title screen.

Under branding, change the logo to Your logo, and your brand logo will display over the Virtual Tour like a watermark.
Click "Link" to get a shareable link you can send directly to your customers and colleagues over email or on Facebook.

Click "Embed HTML" to get code you can copy and paste into your website HTML, to share the Virtual Tour on your website.

And that's it! Now you know the best virtual tour workflow for Insta360 cameras. If you found this post useful then please share it with your Virtual Tour friends so they can also benefit from the best virtual tour workflow.
If you prefer to watch a video about the best 360 virtual tour workflow described above, then check out the video below:
Here is another virtual tour example using the above workflow: